Remember those days in elementary school when the cafeteria line felt like a treasure hunt? You’d shuffle past the mystery meat and soggy veggies, eyes locked on the dessert tray. For me, it was always about those peanut butter bars – thick, chewy, with that glossy chocolate top that cracked just right when you bit in. My lunch lady, Mrs. Thompson, had this way of sliding an extra one onto my tray if I’d helped stack chairs after recess. Fast forward a few decades, and I’m still chasing that nostalgia in my own kitchen. These no-bake lunch lady bars? They’re the real deal, a simple mix of pantry staples that transport you back without firing up the oven. If you’ve got a soft spot for retro treats, stick around – we’re diving deep into why these bars deserve a spot in your recipe rotation.
What Are No-Bake Lunch Lady Bars?
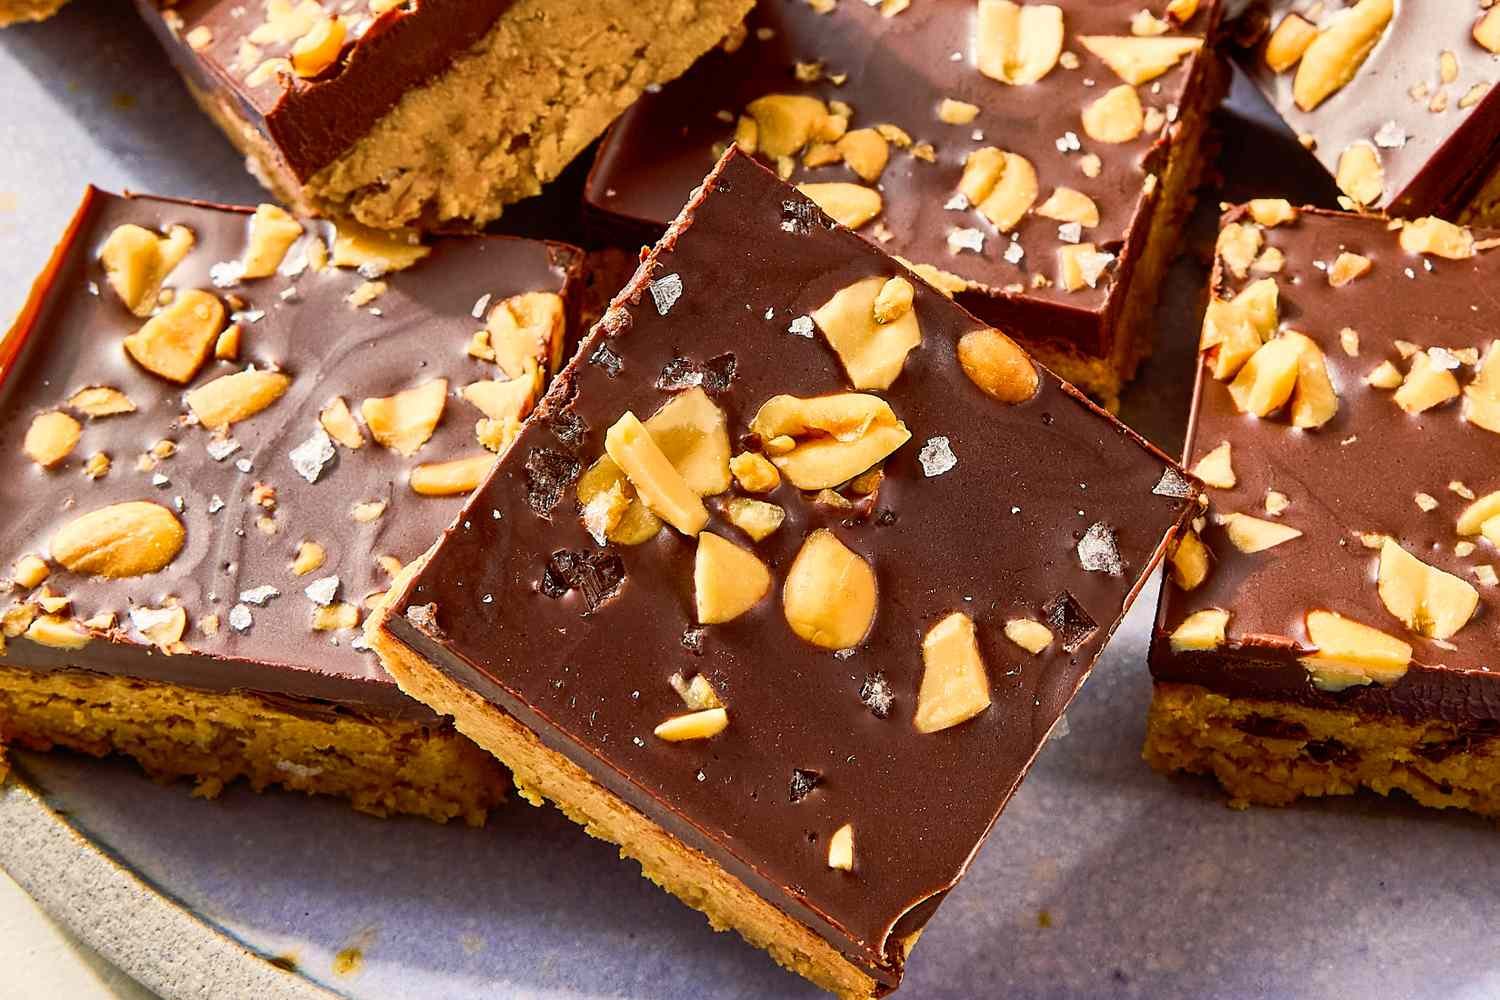
These bars are essentially a love letter to peanut butter and chocolate, wrapped in a crunchy graham cracker hug. The base is a no-fuss blend of graham crumbs, powdered sugar, melted butter, and creamy peanut butter, pressed into a pan like you’re building a sandcastle. Top it with a silky chocolate-peanut butter ganache, chill, and slice. No baking means no waiting for the oven to preheat – perfect for hot days or when you’re short on time. They’re salty-sweet, with a texture that’s part fudge, part cookie bar. Folks often compare them to a giant Reese’s cup, but with that homemade charm that makes you feel like a kid again.
The History Behind the Nostalgia
Picture the 1930s in Lufkin, Texas, during the Great Depression. Folks were getting creative with cheap ingredients like peanut butter, which was plentiful thanks to government surpluses. That’s where some trace the origins of peanut butter bars – simple, filling treats that stretched a dollar. By the 1960s and 70s, school cafeterias across the U.S. adopted them, with lunch ladies whipping up massive sheet pans to feed hungry kids. In places like Utah or the Midwest, they became legends, often scribbled on recipe cards passed from one cafeteria worker to another. I once chatted with my aunt, who worked in a school kitchen in the 80s – she swore by adding a pinch of salt to cut the sweetness, a trick that’s stuck with me. Today, they’re a Reddit favorite, with threads full of folks recreating that cafeteria magic at home. It’s funny how a humble bar can carry so much emotional weight, reminding us of simpler times.
Why These Bars Are Perfect for Modern Kitchens
In a world of air fryers and instant pots, no-bake recipes like this shine. You don’t need fancy equipment – just a bowl, a microwave, and a fridge. They’re crowd-pleasers for potlucks or family gatherings, and they store well, meaning you can make a batch on Sunday and nibble all week. Plus, they’re customizable; swap in almond butter for allergies, or add oats for extra chew. I remember the first time I made them for my kids – they devoured half the pan before dinner, declaring them “better than store-bought candy.” That mix of ease and indulgence? It’s what keeps me coming back.
Ingredients You’ll Need
Gather these basics, and you’re halfway there. Most are pantry staples, so no special trips required.
- 2 cups graham cracker crumbs (about 14-15 sheets, crushed fine)
- 2 cups powdered sugar
- 1 cup creamy peanut butter (natural works, but skip the chunky for smoothness)
- 3/4 cup unsalted butter, melted
- 1 1/2 cups semisweet chocolate chips
- 1/4 cup extra peanut butter for the topping
- Optional: A pinch of sea salt or chopped peanuts for garnish
Pro tip: Use high-quality chocolate chips – it makes a difference in that glossy finish.
Step-by-Step Guide to Making Them
Let’s break it down. This recipe yields about 16 bars, depending on how generously you slice.
Preparing the Base
Start by lining a 9×9-inch pan with parchment paper – trust me, it makes lifting them out a breeze. In a big bowl, mix the graham crumbs, powdered sugar, peanut butter, and melted butter. Stir until it’s like wet sand; it’ll come together with a little elbow grease. Press it firmly into the pan, using the back of a glass for evenness. Pop it in the fridge while you tackle the top.
Melting the Chocolate Topping
In a microwave-safe bowl, combine the chocolate chips and that extra 1/4 cup peanut butter. Zap in 15-second bursts, stirring each time, until smooth. Don’t overheat, or it’ll seize up. Pour over the chilled base, spreading gently with a spatula. If you’re feeling fancy, sprinkle flaky salt or peanuts on top for crunch.
Chilling and Slicing
Refrigerate for at least an hour – longer if you can wait. Once set, lift out using the parchment and cut into squares. A warm knife helps with clean edges. Serve chilled or at room temp; either way, they’re addictive.
Tips for Perfect Bars Every Time
Avoid common pitfalls. If your base is too crumbly, add a splash more melted butter. For a thicker chocolate layer, up the chips to 2 cups – but watch the sweetness. Store in an airtight container in the fridge for up to a week, or freeze for months. Thaw at room temp for that just-made taste. And if you’re baking for a crowd, double the recipe in a 9×13 pan; just chill longer.
Variations to Spice Things Up
Keep it classic or get creative. For a gluten-free twist, use gluten-free graham crackers or swap with crushed pretzels for saltiness. Vegan? Opt for plant-based butter and dairy-free chocolate. Add-ins like coconut flakes or mini marshmallows mix it up. One time, I stirred in rolled oats for a heartier bite, turning them into energy bars – my hiking buddies loved it. Or try white chocolate topping for a sweeter vibe. The beauty is in the experimentation.
- Classic: Stick to peanut butter and semisweet chocolate.
- Nutty: Top with chopped almonds or hazelnuts.
- Spicy: A dash of cinnamon in the base for warmth.
- Healthy-ish: Use natural peanut butter and dark chocolate.
Nutritional Breakdown
These aren’t health food, but they’re a treat worth savoring. Per bar (based on 16 servings):
| Nutrient | Amount | % Daily Value |
|---|---|---|
| Calories | 304 | 15% |
| Total Fat | 20g | 26% |
| Saturated Fat | 9g | 44% |
| Carbohydrates | 31g | 11% |
| Protein | 4g | 8% |
| Sugars | 22g | – |
They’re energy-dense from the nuts and butter, so portion control is key. But hey, the peanut butter adds some protein – small wins!
Pros and Cons of No-Bake Lunch Lady Bars
Pros:
- Super quick – ready in under 90 minutes.
- No oven needed, ideal for summer.
- Kid-friendly to make and eat.
- Customizable for dietary needs.
Cons:
- High in sugar and fat – not everyday fare.
- Needs chilling time, so plan ahead.
- Can be messy if not pressed firmly.
Overall, the pros outweigh the cons for a fun, nostalgic dessert.
How They Compare to Other Treats
Wondering if these stack up against favorites? Here’s a quick table.
| Treat | Key Ingredients | Bake Time | Texture | Flavor Profile |
|---|---|---|---|---|
| Lunch Lady Bars | Graham crackers, PB, chocolate | None | Chewy-crunchy | Salty-sweet PB chocolate |
| Reese’s Cups | PB, chocolate | None | Smooth | Intense PB center |
| Scotcheroos | Rice Krispies, PB, butterscotch | None | Crispy | Sweeter, with butterscotch twist |
| Brownies | Flour, cocoa, eggs | 30-40 min | Fudgy | Rich chocolate |
These bars edge out for ease and that retro feel – like a grown-up version of school lunch.
Pairing Suggestions
These bars shine solo, but pair them right for max enjoyment. A cold glass of milk cuts the richness – classic combo. For adults, try with coffee; the bitterness balances the sweet. At parties, serve alongside fresh fruit like strawberries to lighten things up. I once paired them with vanilla ice cream for sundaes – total hit at a family BBQ. Or crumble over yogurt for breakfast (shh, don’t judge).
Storage and Make-Ahead Tips
Make them ahead for stress-free snacking. Fridge: Up to 7 days in a sealed container. Freezer: Wrap individually in plastic, then foil – lasts 3 months. Thaw overnight in the fridge. If they soften, a quick chill firms them up. Pro move: Cut and freeze portions for grab-and-go treats.
Where to Get the Best Ingredients
Stock up smart. For graham crackers, Honey Maid is reliable – find at any grocery store. Peanut butter? Skippy or Jif for creaminess; natural fans, go for Justin’s. Chocolate chips: Ghirardelli for premium melt. Online, Amazon has bulk options, or check Walmart for deals. Local co-ops often have organic versions if that’s your jam.
Best Tools for Making These Bars
You don’t need much, but these help:
- 9×9 pan: Non-stick for easy release.
- Parchment paper: Essential for lifting.
- Microwave-safe bowl: Borosilicate glass is best.
- Offset spatula: For smooth spreading.
- Food processor: Quick crumb crushing.
Invest in quality – it’ll make the process fun.
People Also Ask
Based on real Google queries, here’s what folks wonder.
What makes lunch lady bars so nostalgic?
They evoke school days, with that simple, comforting flavor profile from cafeteria treats.
Can I make them without peanut butter?
Sure – try almond or sunflower seed butter for nut-free options.
How long do they need to chill?
At least an hour, but overnight is best for clean slices.
Are they gluten-free?
Swap graham crackers for gluten-free ones, and yes.
FAQ
What’s the difference between baked and no-bake versions?
Baked often include oats for chew, while no-bake rely on graham crackers for crunch – both delicious, but no-bake is quicker.
Can kids help make them?
Absolutely – mixing and pressing is safe and fun.
How do I fix if the topping cracks?
It’s normal; embrace it for texture. If unwanted, let warm slightly before slicing.
Are they suitable for vegans?
With vegan butter and dairy-free chocolate, yes.
What’s the calorie count per bar?
Around 300-400, depending on size – enjoy in moderation.
There you have it – everything you need to whip up these retro gems. Whether it’s a family treat or a potluck star, they’ll bring smiles. Give them a try; you might just start your own tradition. (Word count: 2,756)